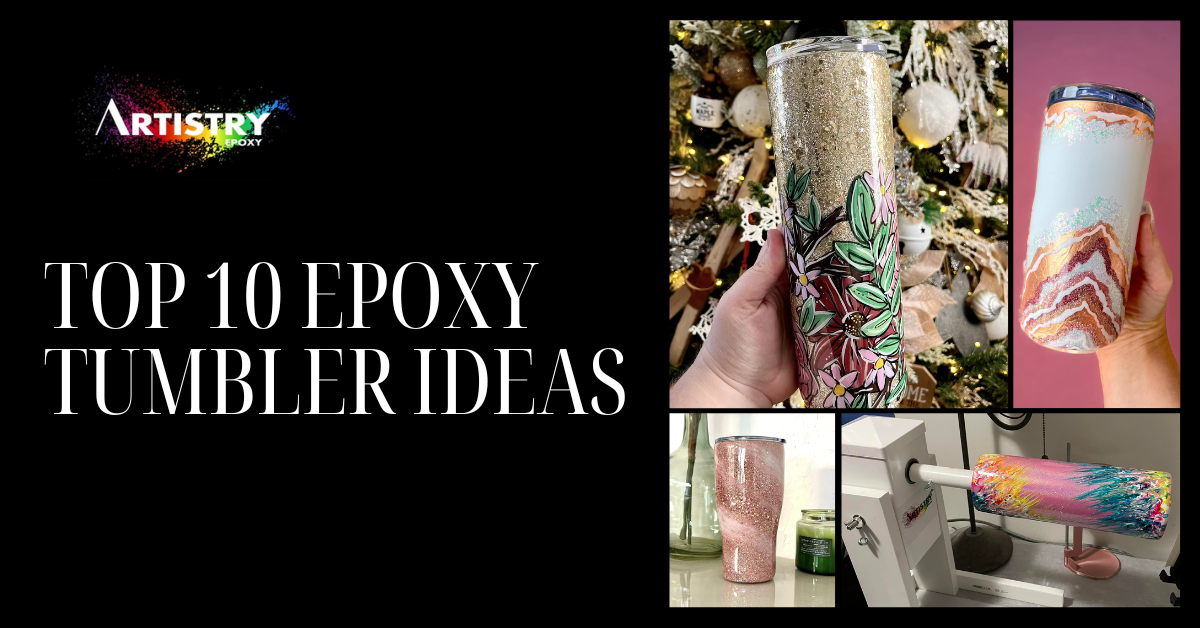
Top 10 Epoxy Tumbler Ideas with Glitter, Pigments & More
Crafting epoxy tumblers is one of the most exciting and rewarding trends in the DIY world. Whether you're making a custom tumbler for personal use, creating gifts, or building a small business, epoxy resin offers a durable, glossy finish that takes your designs to the next level. Its ability to hold vibrant pigments, glitters, and inks makes it a favorite among beginners and experienced crafters alike.
In this guide, we’ll explore 10 creative epoxy tumbler ideas using glitter, mica pigments, alcohol inks, and more. You’ll also get expert tips on tools, techniques, common mistakes to avoid, and answers to key questions—like how many coats of epoxy on a glitter tumbler—to help you craft with confidence.
What You Need to Get Started
Before diving into the designs, make sure you have the following tools and materials:
-
Stainless steel tumblers (prepped and sanded)
-
High-quality epoxy resin such as Art Epoxy, Fast Set Epoxy, or Hyperspeed Epoxy
-
Glitters, pigments, mica powders, and alcohol inks
-
Cup turner
-
Measuring cups, stir sticks, gloves, and mask
-
Heat gun or torch for bubble removal
-
Painter’s tape, Mod Podge, or spray adhesive
Top 10 Epoxy Tumbler Ideas to Try
Crafting epoxy tumblers offers endless opportunities to express creativity—whether you're designing custom gifts, launching an Etsy shop, or expanding your handmade product line. The glossy finish of resin elevates any design, and with the right techniques, your tumblers can look just as polished as those from top-selling brands.
Here are 10 epoxy tumbler ideas using glitter, pigments, and more—complete with examples and tips to inspire your next project.
1. Full Glitter Tumbler
The full glitter design is a classic—and one of the easiest to start with. Ideal for birthdays, bridal parties, sports fans, or brand-aligned merch, this style offers solid, all-over sparkle.
How to make it:
Apply a base coat (spray paint or acrylic), followed by adhesive like Mod Podge or spray glue. Roll or sprinkle glitter across the tumbler, let it dry, then seal with 2–3 coats of epoxy.
Creative tip: Use custom glitter mixes to give your tumblers a signature look. If you want more control over color and texture, Fill-A-Bag Glitter lets you build your own blend—perfect for seasonal or branded themes.
2. Glitter Ombre Fade
Great for Valentine’s Day, fall tumblers, or wedding colors, the ombre fade tumbler transitions between two or more glitter shades. It adds depth and dimension to your design.
How to make it:
Start by applying your base glitter (usually the darkest color) to the top or bottom of the tumbler. As the adhesive remains tacky, gradually add the second glitter, blending gently where the colors meet. Let dry before adding epoxy.
Example: A gold-to-rose ombre makes an elegant wedding favor; red-to-black works beautifully for a gothic or Halloween theme.
3. Galaxy Pigment Swirl
If you're into bold, dramatic designs, the galaxy swirl tumbler is a showstopper. It's ideal for astrology lovers, sci-fi fans, or themed subscription boxes.
How to make it:
Begin with a dark base coat (black, navy, or deep purple). Mix epoxy with pigments like blue, silver, and purple. Pour the pigmented resin in sections while the tumbler rotates, and gently swirl using a silicone stick.
Pro tip: Use pigment pastes for bold, saturated color. The Pigment Paste Collection blends smoothly and holds its color even after curing, perfect for achieving a cosmic feel.
4. Alcohol Ink Marble
Perfect for minimalist or modern designs, alcohol ink marbling creates stone-like textures and soft flowing movement. These are great for professional gifts or neutral-toned product lines.
How to make it:
After a white or neutral base coat, pour a clear layer of epoxy and drop alcohol inks into it while wet. Use a heat gun or straw to move the ink, creating organic marbled veins. Avoid overmixing to maintain clean contrast.
Example: Black and gold inks over white epoxy create a high-end, masculine tumbler; turquoise and grey can resemble natural agate or marble.
5. Beach-Inspired Tumbler
Great for summer markets, coastal boutiques, or travel gifts, the beach tumbler brings sand and sea together in a layered design.
How to make it:
Start with a “sand” layer using tan glitter or pigment. Then blend upward using ocean blues and teals. For waves, add white pigment where the blue meets the tan and use a heat gun to gently stretch it into foam-like lines.
Example: Customize with names in coastal font or add small seashell decals to finish the look. Using a fast-curing epoxy can help you build layers quickly for wave control.
6. Vinyl and Decal Showcase
If you want to highlight logos, quotes, or monograms, this clean layout makes your decal the focal point. It’s perfect for small businesses, personalized gifts, or bridal party cups.
How to make it:
Apply your base (glitter or pigment), seal it with epoxy, and let it cure completely. Lightly sand, then apply your vinyl decal using transfer tape. Seal with 1–2 more coats of epoxy to ensure a smooth, durable finish.
Example: A holographic monogram over a fine champagne glitter base makes a chic bridesmaid gift; a company logo on solid color pigment is ideal for branded drinkware.
7. Milky Way Effect
Inspired by the stars, this style combines pearl whites and soft metallics over a dark base to create a dreamy celestial effect.
How to make it:
Start with a navy or black base coat. Mix small amounts of white and pearl pigment into epoxy and apply in swirling patterns. Use a heat gun to stretch and soften the movement. Add fine holographic glitter for star-like sparkle.
Example: Perfect for moon-phase or astrology-themed tumblers, especially when paired with constellations or zodiac decals.
8. Neon Drip Tumbler
This fun, high-energy design is great for music lovers, teens, and festival-goers. It uses gravity to create bold drips of neon color.
How to make it:
Apply a base coat (black or white works best). Mix neon pigments into epoxy and apply thick vertical lines at the top while the tumbler rotates. The epoxy will drip downward, creating an abstract, colorful effect.
Example: Neon rainbow drips over a black base are eye-catching for Pride tumblers; pink and green over white make great summer party favors.
9. Geode-Inspired Crystals
This design is ideal for gemstone lovers, crystal healing shops, or high-end handmade markets. Mimicking the look of sliced agate, these tumblers have texture, metallic highlights, and layered shimmer.
How to make it:
Sketch your geode layout on the tumbler, then fill with layers of glitter, pigment, and resin. Define each layer with metallic pigment or vinyl striping to mimic crystal lines.
Example: Use purples, silvers, and chunky glitter for an amethyst geode look; switch to blue and gold for a lapis-inspired cup.
10. Smoke Swirl Tumbler
Simple, sophisticated, and surprisingly impactful, this design mimics swirling smoke using subtle pigment movement.
How to make it:
Start with a clear epoxy layer. Add a drop or two of white pigment and use a heat gun to guide it gently across the surface, forming soft, drifting lines. The effect works best when minimal—less is more.
Example: This style is great for memorial tumblers or masculine designs. Pair it with a matte decal or metallic nameplate for an elevated finish.
Common Mistakes to Avoid
Inaccurate Measuring
Epoxy resin must be mixed in exact ratios (usually 1:1 or 2:1). Guessing measurements leads to curing failure, tackiness, or surface flaws.
Mixing Too Fast
Stirring too quickly introduces air bubbles that are difficult to remove, especially on curved tumbler surfaces. Mix slowly and thoroughly for 3–5 minutes, scraping the sides and bottom of the cup.
Poor Surface Prep
Failure to sand and clean your tumbler before applying epoxy can cause peeling or poor adhesion. Always wipe down with alcohol after sanding.
Cold Resin Application
Resin that is too cold becomes thick and difficult to work with, increasing the likelihood of bubbles. Warm the bottles in a warm water bath (sealed) before mixing.
Rushing Coats
Always let each epoxy coat cure completely before sanding or reapplying. Rushing can result in cloudy finishes or imperfect leveling.
Frequently Asked Questions
How many coats of epoxy on glitter tumbler?
Most glitter tumblers require 2 to 3 coats of epoxy resin. Fine glitter may need only two coats to achieve a smooth finish, while chunky glitter often requires a third coat to fully encapsulate the texture. Be sure to allow full curing between coats and sand lightly between layers for optimal adhesion.
Can I use any glitter in epoxy?
Not all glitter is created equal. Solvent-resistant polyester glitter is recommended for use in epoxy resin because it retains color and shine during curing. Avoid craft glitter made from paper or other materials that may bleed or dull.
What is the best epoxy resin for tumblers?
The best epoxy resin depends on your needs. Art Epoxy is great for detailed artistic work with vibrant pigments. Fast Set Epoxy is ideal for quick-turnaround projects, while Hyperspeed Epoxy works well for batch production with rapid curing.
Why is my tumbler sticky after curing?
Sticky resin usually indicates improper mixing or an incorrect ratio. Always mix thoroughly for the full recommended time and ensure your measurements are precise.
Can I speed up epoxy curing?
While some heat can accelerate curing, using a fast-curing resin like Fast Set or Hyperspeed is safer and more reliable than artificial heating methods, which can cause yellowing or defects.
Do I need to sand between epoxy layers?
Yes, sanding between coats improves adhesion and levels any imperfections. Use a fine-grit sanding block (typically 220–320 grit), then wipe clean with alcohol before applying the next coat.
Create, Pour, and Shine with Artistry Epoxy
Every epoxy tumbler is a chance to bring your creativity to life. With the right ideas, techniques, and products, you can produce stunning, professional-quality designs that stand out.
Artistry Epoxy is trusted by makers across the country for its high-performance resins, vibrant pigments, premium glitters, and beginner-friendly formulas. Whether you're crafting for fun or building a tumbler business, our products help you create with confidence.
Explore our full line of epoxy resin to start your next masterpiece.


