TUMBLER BURST SHEETS TUTORIAL! All about Shape Tape!
One nice thing about shape tape is it is paintable. You'll be able to paint it and leave those little lines. You don't have to do the nail tape or any finishing work. It's already there. This design only had this on the front. I left me for you to see. I wanted to do a cup that only had that design, that much of the design on the show. I was going to put my name on the back side; I'm carefully cutting this out. You could do this before you cut it out of shape tape. You save shape tape you don't waste. I'm not that great with designing stuff. By changing the downloads, I cut out the whole thing and trimmed it by hand.
I have the little section. I have my painted cup in the little section. I started peeling it. I wanted to note that I did not resize this template at all, and doing what I did, I should have made it a tiny bit smaller because it is from the very top to the cup to the bottom. It would have worked better if I had left a little space without anything. It would have held onto the cup better but gently placed it on it; however, if you're doing the whole cup, it's best to start on the side, not on the top. I am, but because it's less, I thought to do this because it's less.
Then I'm taking two glitters. This is Christmas eve, and then a bar of silver, and this is a black that I'm getting. So on, it is on order. I am excited because many black glitters disappear under epoxy, but you'll take this as a needle pen. We have these available on the site as well, and kind of pick it up and peel it off however you see fit, but start with whatever color you're doing at once.


This middle row is going to be black; I'm peeling them all off at the same time. It is important to note that you should be going darkest to lightest with your glitter colors because, let's say, you're using white and black glitter. If you lay your white glitter first, you could get a couple of little specks of the black one sticking on top of the white, and we don't want that. Go darkest to lightest.
There's the black now going in with the next color, going along and peeling those all off. When I started testing if this was paintable, I was a little nervous about, you know, scratching the paint when I was peeling off parts or the paint kind of rubbing off or something that, and there was none of that. It stayed nice. It was not very fragile. It worked well. I'm impressed with how you are painting it. You can do whatever you want. You can paint it any color. I can't get over it. You guys, I'm excited about that fact. Okay, then going on with Christmas eve, it's a silvery pink, and this is a medium cut. The black is more of a small amount.
And you can see its kind of chunky sparkle. Going in with the silver sped it up. We're not sitting here for 20 minutes. So I'll rub it on those sections to ensure you're getting good coverage.
Once I was done, I got in with a brush to ensure I was getting all the excess glitter off. I took my glitter glue and did my glitter on the bottom. I kind of tried to stay inside that little rim. Adding a little pop of something on the bottom is always lovely since shape tape will only go around the outside. Then I sealed that with the clear rust-oleum matte spray paint, and I did probably two or three coats then because that little section was not sticking. I took glitter glue and a needle bottle and went in there.


I stuck it down, so it wasn't flapping in the wind while trying to do epoxy. I wanted it to stay. Once dry and sealed, I went in with my artistry epoxy. You can see that glitter is not budging at all. I sealed it well, and you can do it in 20 minutes to an hour, depending on how fast you're working.
Then cutting out my name, you can see that the settings here I'll all put down in this description box the settings I used to cut the shape tape and then the settings I'm using to cut my name. Still, the difference is that we are missing the top paper and the sticky layer, but we're not cutting the bottom layer. I'm going in and cutting the offset in the iridescent or pearlescent or whatever it is opal vinyl that we have a pretty outline and then glitter inside of it, and that's the offset is regular settings for viny. Still, for my name, we need to get those settings correct so that we cut, as I said, through the two layers and not the bottom layer, then I have my shape tape cut out. My vinyl and the vinyl are usual. You peel off the outside of your name, and I mean, you can do this with words and little shapes and stuff instead of doing a full wrap now with the shape tape. I'm peeling off the top layer and the sticky layer and leaving my name on with both the moist and the top layer.
Now weeding out those insides, then I took me packing tape it's what I had again still have not found a transfer tape that works well for me tape it Is then this was a little bit tricky you want to peel up both layers onto the tape you want to make sure that sticky layer is staying on there which because you can't see it you kind of having to feel and make sure that you're peeling it up. Still, it is a little more tricky than vinyl to get it all on there and keep it in the same spot. So I'm taping down my piece with the vinyl I can see and get it right centered, sticking that on there.


And the possibilities with this are endless. You could do two different offsets, two different colors. You could do multiple layers. You could ombre the glitter. You could do rainbow glitter inside my brain is full of ideas. You're going to peel off all the layers again. It's a little tricky because you're still peeling off three layers now, then stick it right on your cup. Make sure it's even and centered than with this. You're peeling up that top paper layer. Then you have the sticky layer showing.
Then I'm taking that silver glitter, the same thing pours it on, kind of rub it out and dust it off, then take a brush kind of brush it off, and I don't know why sometimes glitter is statically stuck to the cup, but the epoxy is not tacky or sticky at all. It took me a few minutes to get it cleaned off, and then you could see around the letters in those little tiny crevices there were getting little glitter stuck. Hence, I used my fingernail to kind of push it off and dusted it away, I went in and spent four or five minutes cleaning this up because I wanted this to look nice and perfect, don't neglect your edges of things, but that is the name how it came out. I love it. I still see a couple of glitters; I probably got them Later, but then I sealed the front and went in with my epoxy. I think I did two more layers to finish off this cup was done.
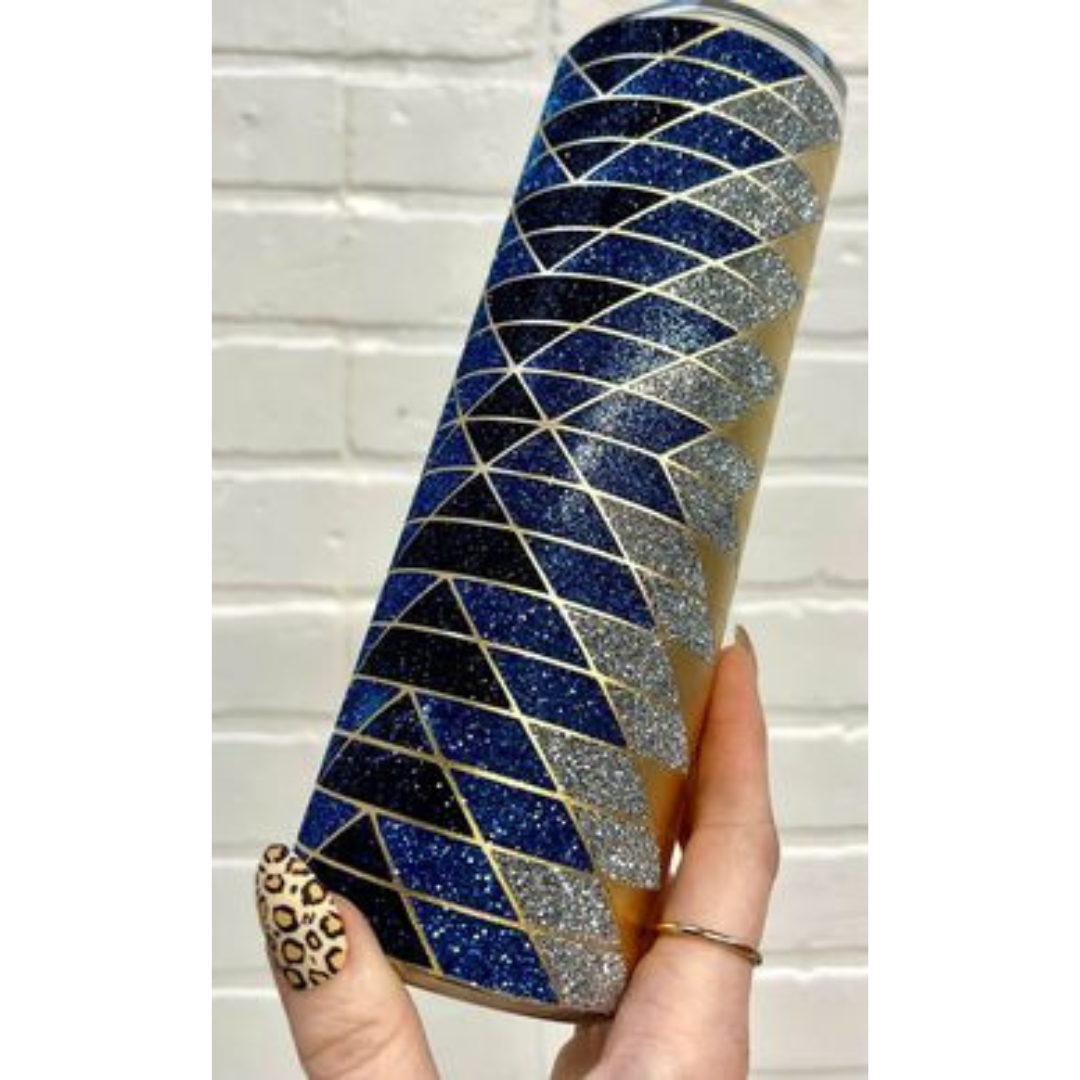
Take it off the turner, put the cap on, and that is my cup. As I said, I'm excited about all the crazy amazing things you guys will do with shape tape. Make sure you guys tag us. If you have any questions, let me know below, and I will be doing more tutorials using shape tape, but you guys, it is. I am excited. This is how my cup turned out. I've been using it every day, and she's pretty. That is it for this video. Thank you much for watching, and I will see you at the next one. Bye.
Related Posts

DiY Epoxy vs. Artistry Epoxy: What Happened to “Speedy Petey” and What’s the Best Epoxy for Tumblers & Art?

How Long Does It Take for Epoxy to Yellow (And How to Prevent or Fix It Like a Pro)

Top Reasons Why Your Epoxy Is Sticky and How to Avoid Them

Top 10 Epoxy Tumbler Ideas with Glitter, Pigments & More

How to Mix Epoxy Resin Like a Pro: The Ultimate Guide for Tumbler Artists & DIY Crafters

BRIDAL Tumbler Tutorial using Shape Tape Double sided adhesive sheets!
