
Autumn Aesthetic Cutting Board And Coaster Set!
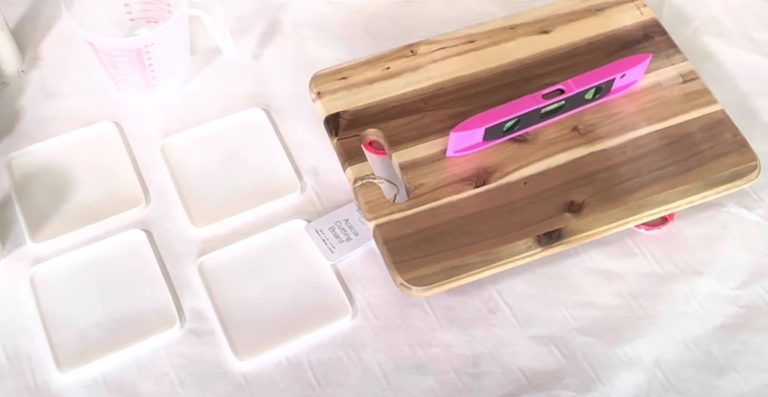
Hey guys. I'm just starting with some of these square silicone molds. I will have these linked down below. They're from amazon and just this little tray I got from (I believe) Ross. It's acacia. It's a really pretty wood so the first thing you're going to want is to lift your surface.
We have these leveling feet on artistryepoxy.com if you're interested, but make sure your cutting board is level. If it's not level, you're gonna have all your artwork run either off the board or further onto the board.
We don't want that!
So then I'm separating it into I don't know how many different colors I did but just a bunch of different colors. Going in with filter first. This is a super fine glitter from my color flex collection.
Then this is Shade. It's just a dark brown mica powder and I'm using five of the six mica powders from the desert collection on this tray. I just don't use Prickly Pear which is a little bit of a green shade. Taking Sahara which is a more burnt orange shade than Sierra which is a more reddish tone than Savannah, which is this gorgeous deep like Burgundy Purple. Then Cactus Flower which is a more like kind of pinky tone takes some of my wave white pigment paste. This is just a red dye. I just did quite a few drops in there and then this last one here I am doing Sahara and then just a Pearl mica powder to kind of make a lighter orange mix so then I'm just kind of laying it down on the board in just kind of different random patterns.
I didn't have anything mapped out I've seen where people will kind of draw on the board and kind of map out where they want things and it looks cool. I do want to try it that way I just have not done that yet just kind of laying it out just taking different colors kind of going inside of the lines I created or outside or creating new lines. There's no rhyme or reason to it. Just keep going until the whole area is covered and I could not just do 10 videos for my 10 days of fall. I had to sneak another one in there.


I am also already planning on my Christmas series so I'm excited that this was just so much fun to do just so many videos every single day. I thought, you know I think I'll do 12 for Christmas because 12 days of Christmas. Obviously, but it was just such a fun thing to do so I'm excited to get ready for that then yeah I think these series could just be a regular thing on my channel.
I'm just adding the filter glitter in there and I think it looked so pretty just with these micas. Kind of something to add a little extra without looking too chunky glittery if you know what I mean. Sometimes glitter on pieces like this can look a little like it can kind of "cheapen" it a little bit to where it looks a little more like craft. You just threw craft glitter on there whereas the filter is just a super fine kind of shimmer sparkle instead of being just glitter so I love the effect that it gave. Keep layering them on there until the whole area is pretty much covered.
Also, I forgot to mention in the beginning I did sand the bottom portion of this board before I started and you just want to make sure your board's a little bit prepped. You don't need to do too crazy of sanding, you just want to make sure that the surface is going to adhere to the epoxy and you're not going to have it lift and peel off. So just sand beforehand.
I don't think I mixed up enough epoxy. If you are doing something on a cutting board where you're just laying it and spreading it thin, this would have been more than enough epoxy but this technique of laying it down and letting it sit. You're not spreading it, you need a lot more epoxy. If you were to spread this around right now, you would just get them all mixed and muddied. So now starting on the coasters I'm just laying out some clear and this epoxy.
I'm testing a one-to-one Fast Set epoxy I would not suggest doing a tray and coasters at the same time. Do them separately because it was starting to set up and I did not have time to kind of move and mix these epoxy around in the coasters. I didn't have enough mixed up and you don't want to mix epoxy like you don't want to make more and then mix them it doesn't work very well. My plan originally was not to just lay it out like this and barely move this color but that's kind of what happened.
When I'm doing four coasters like this I like to do matching sets so there are two different kinds of styles that I'm doing. Yet they all kind of match the charcuterie board so just add some of that filter in the middle to give it a little shimmer.


Then I went back and added a little more filter on just the empty spots that or a torch would work since we're not moving this color around. It's more just popping the bubbles, taking the heat gun in the coasters, and just getting in there and warming up this epoxy because if you don't do this you're most likely going to end up with air bubbles and we don't want that.
Tip: You want to go and take just some of the epoxy that's fallen off and rub it on the edges just make sure all the edges are just coated well with the epoxy you don't have any wood showing.
We're adding more clear to the coasters to fill them up once the first layer was cured so just pouring in completely clear and spreading it out, then really get in there with the heat gun and you can see especially the one in the front that I'm not doing. You can see all the bubbles starting and you can just see when I go in with the heat gun that it just pops them all and makes it so glassy smooth.
I also wanted to mention this one-to-one Fast Set. These edges just have so much pigment on them. Usually, my edges will just fall off and you can see the wood through and so I am impressed with this epoxy for doing artwork like this on boards. Now I'm taking my metallic paint pens and drawing kind of lines everywhere in between colors, outlining things. I don't go in between every single color or every single line. Just keep going with it until you are happy with it and feel like you should stop.
These craft smart paint pens I get from Michael's. They do have silver or copper as well. Then I'm going in with the fatter pen to add a little bit of fatter lines here and there.


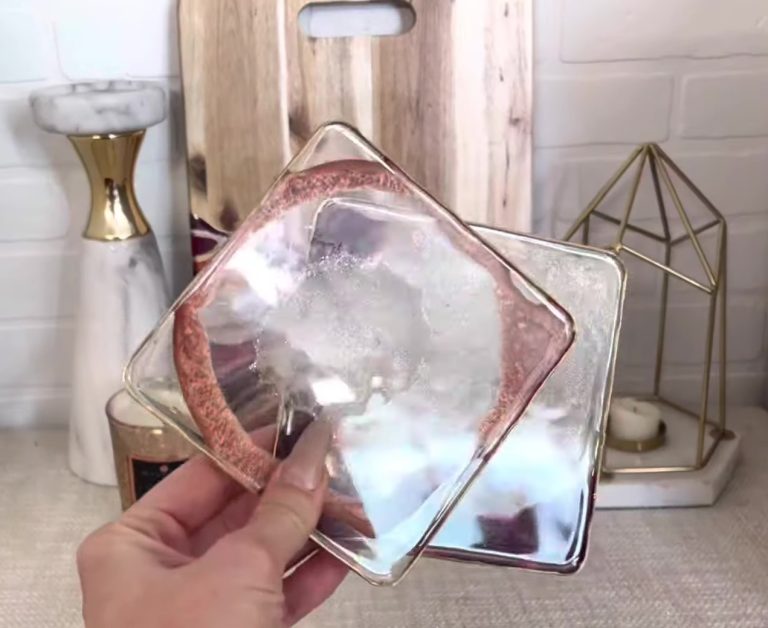
Then I let that dry for a good several hours at least before putting on epoxy. We're doing another layer of clear just to seal in the metallic pen. If you get any on the board just clean it up with a little bit of alcohol before it cures that way you don't have to worry about it. If you wait till it cures you're going to have to kind of pick it off or sand it off and that's just a mess. Once my coasters were cured, I take them out of the molds. Again, these are not my favorite designs of coasters that I've ever done. I wish I had mixed up more epoxy and/or waited and mixed up this epoxy separately and did the same colors because I would have gotten a lot more movement in those coasters.
So... I'm just taking this deburring tool. This is from Amazon (I'll link it down below). If you just run it along the edge instead of sanding and it's not (I wouldn't say it's like) the cleanest line. It gives it a little bit of a waviness sometimes but it's really easy and just something so quick to do to get those harsh edges down. Then I'm taking that same paint pen (the thicker one) and just going over the edges.
Then I just run it along the top edge as well so you can kind of see that metallic pop from the top. You also want to sand the back of the cutting board (I did not film that but this set was done). I think it turned out just gorgeous. Even the coasters as they are just the whole set I don't know what it is with these colors lately, but this whole Fall/Autumn warm colors I have been loving lately.
Let me know what you guys think if you guys try out this board. Make sure You post it to social media and tag me. I would love to see your creations. Thank you guys so much for watching. I will see you guys in the next one.
MATTE and GLOSSY Mountain Mug Tumbler Tutorial!
NEON QUEEN RAINBOW POWERWASH PEEKABOO TUMBLER TUTORIAL!
Related Posts

DiY Epoxy vs. Artistry Epoxy: What Happened to “Speedy Petey” and What’s the Best Epoxy for Tumblers & Art?

How Long Does It Take for Epoxy to Yellow (And How to Prevent or Fix It Like a Pro)

Top Reasons Why Your Epoxy Is Sticky and How to Avoid Them

Top 10 Epoxy Tumbler Ideas with Glitter, Pigments & More

How to Mix Epoxy Resin Like a Pro: The Ultimate Guide for Tumbler Artists & DIY Crafters

BRIDAL Tumbler Tutorial using Shape Tape Double sided adhesive sheets!
