
NEON QUEEN RAINBOW POWERWASH PEEKABOO TUMBLER TUTORIAL!
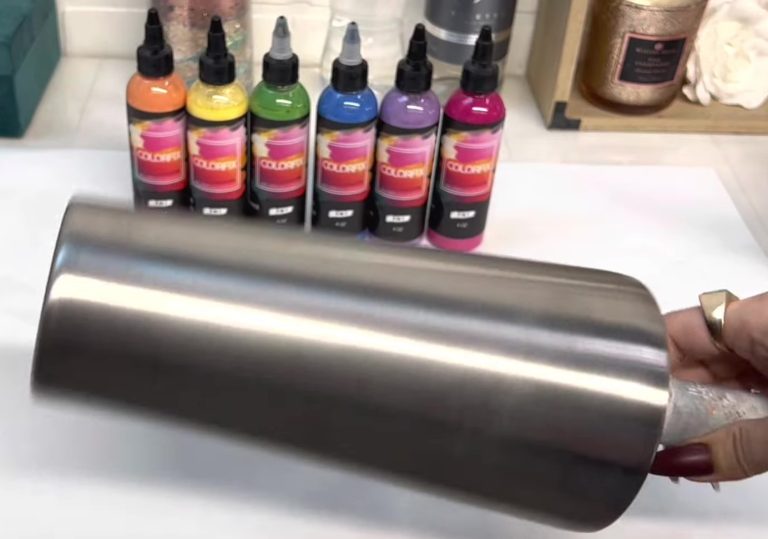
Hey guys, I am starting with this 32-ounce, I believe, tapered cup, and we're going to do some rainbow stripes, so I sectioned it off already for my six colors.
I'm using color fix navel banana cream, rainforest, cool water, and finally violet and glam. This is all a part of my bright collection. You could also get the red poppy, Let me try this with the paint roller and see if it worked. I went around and just kind of squirted paint on like a decent amount in each section. Now going to color by color, starting with pink at the bottom and working my way up to orange at the top of this cup. I made for my friend veronica. She came in a couple of months ago and saw my Christmas queen cup that I had done last year.
She loved that cup and wanted me to make her one, and I said I would make something similar for you if I could do a video on it. She told, she wanted something with a rainbow, which I thought of, so this is veronica's queen cup. I took that and was donning it a little bit at first, dotting it back and forth, just blending and spreading it out.
I used too much paint, so I'd probably do a little more than half of it. Still, I didn't want it not to have enough, but yeah, you get the point. I went up and down to blend the colors a little more. I don't know why my green kind of disappeared. It's not as big as all the other colors, but that's what happened on the bottom.


I took three colors on one part and three on the other side and blended them so that you have a little peekaboo of color at the bottom once that is dry. I'm using my glitter glue to go in with some glitter. The easiest way is to take it, put it all over the cup, and then spread it out with my gloved hand.
So glitter, I am using my neon ignite for purple is frigid. I didn't have a lighter purple neon electric for the blue. This is love birds from my tropical collection neon vivid and birds of paradise also from the tropical collection. When ordering the neon colors, I did not get purple or orange. Since I had to substitute those, I would also pick the different green.
I had a mix of the kind of neon smaller cut glitter and then just kind of different mixes. Hence, it ends up looking good. I'm delighted with how it turned out. Still, if you had all neon colors, you could do that with all iridescence. You can make them all match, mix, and match to you. I ended up mixing and matching mixing and matching. I sort of lay down my first layer of the color in its spot. I go back in after any blend them but pretty self-explanatory just lay them on as you go, and I don't know why I was not putting something underneath and trying to save the glitter; I ended up with a ton of glitter that got all mixed.


I couldn't do anything with it because when you mix that many colors it just did not it was kind of like a muddy mess now I'm going back in and just blending those until I was happy with how it looked then on the bottom, I chose to do white cap it's just a white iridescent glitter. Still, I thought it'd be pretty, a little pop on the bottom, and then you could see the colors peeking through, so once that was done.
I've sealed it with clear spray paint, and then I'm doing my first layer of epoxy. This is the fast-set artistry one-to-one facet. It's my fav. I use it all the time. I'm going bicolor just in case glitter was like to move. I like to do that once that is on there and cured. I took queen just cut out in this kind of more giant block letters and put that on so we can do spray paint for our peekaboo. I put it right in the center. I'm taking the rust-oleum metallic gold and the rust-oleum flat black gold first and then the black and just did a nice coat of each. The nice thing about being in texas is the spray paint dries quickly, especially the metallic. I was able to spray on the gold and then immediately sprinkle on the black, but you want to make sure it's dry enough to do the second coat.
I gave it a few minutes once it was dry. I went in and peeled off the decal. For some reason, this vinyl was sticky. I don't know what kind of vinyl it was, but I've never had that happen with a peekaboo. I ended up peeling it all off just fine. It just was sticky. I don't know.
I also wanted to do distressing with acetone, just taking a paper towel and rubbing it off. I want to see the color peek through, and that's why I did the gold first, so that way you can see a little bit of the gold under there, but I just kept going. I usually like the whole top Rim, the complete bottom Rim, and random spots around the cup.
I'm just taking some more and cleaning it up in those areas, and then I take q-tips and do the same thing to ensure that our sites showing the glitter are nice and clean. There's no spray paint residue on there, and then, taking some power wash and the gold paint again, I spray on top of the letters and the sort of peekaboo spots showing.


I wanted the gold power wash to be on like the black areas, so just doing pretty full coverage where I see the glitter and then all over the black. I just did a light coverage overspray, if that makes sense. You can do me, so I rinse that off, and you could leave it like this.
I wanted a little more, so I sprayed the whole cup like an even layer, even coverage, even layers, I don't know, and did a little bit more of the gold. I did a lighter spray for the second coat. I was very gentle. You can tell it's a more lightweight coat of it. It added a little bit more going on.
Then I took acetone and cleaned up the glitter, which I didn't film. I'm taking the offset of the queen in this iridescent opal vinyl and just layering that on there to get the queen standing out. I just really wanted the letters to pop. Then also added a little crown to the bottom because it's a queen neon queen. She needs her crown. I said that in the same vinyl. I think two more layers of the epoxy and this cup were all done, Now taking it off-putting back the lid. I am obsessed with how it turned out. I think it gives it this geode vibe with the gold power wash, black, and bright colors underneath. I love it, and I hope veronica loves it, so that's it for this video. Thank you guys so much for watching. I will see you at the next one bye.
Autumn Aesthetic Cutting Board And Coaster Set!
Initial V-Split Water Bottle Tumbler Tutorial!
Related Posts

DiY Epoxy vs. Artistry Epoxy: What Happened to “Speedy Petey” and What’s the Best Epoxy for Tumblers & Art?

How Long Does It Take for Epoxy to Yellow (And How to Prevent or Fix It Like a Pro)

Top Reasons Why Your Epoxy Is Sticky and How to Avoid Them

Top 10 Epoxy Tumbler Ideas with Glitter, Pigments & More

How to Mix Epoxy Resin Like a Pro: The Ultimate Guide for Tumbler Artists & DIY Crafters

BRIDAL Tumbler Tutorial using Shape Tape Double sided adhesive sheets!
