
Falling Leaves Tumbler
Hey guys. Today's tutorial is this a beautiful falling leaves tumbler. I had so much fun doing this, it's just so pretty and it's very fall looking. I think this turned out really pretty. I used two of my glitters here, these two are from the beach collection. You guys will see that in the tutorial. But yes, if you guys want to see how I did this beautiful falling leaves tumbler let's get into the tutorial. So I started out with this cute black cup. I really like how it's shaped. I found this at Fred Meyer. So first I prepped the cup and got it ready to spray paint. I then spray painted it black even though it's already black, I just wanted a nice even coat of fresh black paint. I started off with the first layer of epoxy. This is my Artistry art and tumbler epoxy, and I just did a nice thin layer of that. Once that was dry, I took a little bit of the same mixed epoxy and I mixed that with some of my glitter flakes. I had two different colors I was trying to choose from, Moonlight and Sea Foam and for this cup I decided to do Moonlight. So what I did is put some of that in a cup and then added my epoxy to it and stirred it up.


I also added some mica powder. It has a pearlescent pink green shift to it. This mica powder is not too fine. It's like in between a glitter and mica. It's like a little bigger cut of mica if that makes sense. I tried getting the right consistency and spread it on the top. I first went around the very top with a good amount of this. I find doing this with these glitter flakes makes it a lot easier to use on a cup since you're kind of pushing it and spreading it on instead of sprinkling. There's a lot less chunky bits sticking up. So doing this with these type of irregular glitter flakes works really well. So I then started spreading it downwards to give us that kind of falling look, streaking down the cup. Just keep working with it until you're happy with how it looks. You want the most coverage up at the top rim and then you want it fading down. Then just wipe the top and make sure there's nothing sticking out the top.


Once that was dry, I added more epoxy. After that, I took a fine sandpaper and sanded it because you do get a little bit of little pokey parts, but it's definitely way easier and much less sanding then when I typically sprinkle this kind of glitter on a cup. So I definitely recommend doing this technique where you smooth it on with a little bit of epoxy mixed in. It's so much easier. So then I added these fall leaf decals, they're actually just stickers, which I believe were from Hobby Lobby. Then I placed them around the cup in different spots, kind of moving them around so it kind of looks like they're falling. After that I added another layer of epoxy. While the epoxy was still wet, I added my golden hour glitter, sprinkled it on and let it fall down. Just let it fall down the cup to kind of give you that ambre fade effect where it's more heavy at the top and then fades down. Then, as you fill in the top, turn the cup so that you're getting full coverage on the top rim part. Doing this technique where you put epoxy all over the cup, like a normal layer and then sprinkling on glitter, is going to make your glitter lay more flat on top of the epoxy. You can see all the pieces of glitter and they're more flat which gives you more of a shiny metallic look.


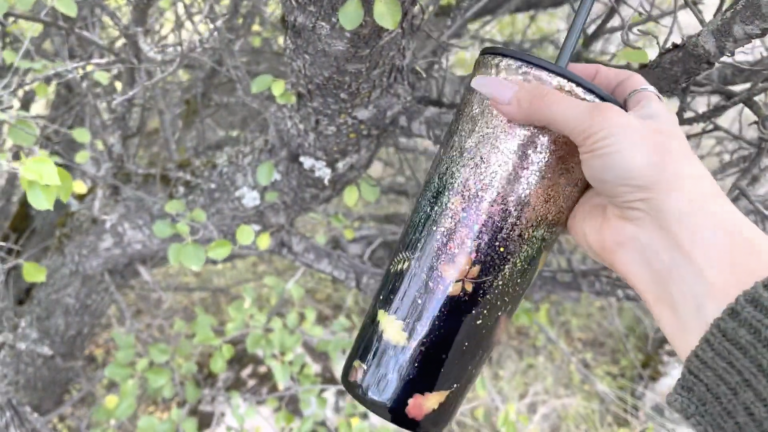
Then one or two more layers of epoxy and the cup is finished. After that it was all done. I love how it turned out. I think it's so beautiful with all the different colors in there but you still have the gold with the pops of color in it along with the leaves. It just turned out really pretty.
That is it for this tutorial guys. Make sure you stay tuned for future cups. Bye!
Related Posts

DiY Epoxy vs. Artistry Epoxy: What Happened to “Speedy Petey” and What’s the Best Epoxy for Tumblers & Art?

How Long Does It Take for Epoxy to Yellow (And How to Prevent or Fix It Like a Pro)

Top Reasons Why Your Epoxy Is Sticky and How to Avoid Them

Top 10 Epoxy Tumbler Ideas with Glitter, Pigments & More

How to Mix Epoxy Resin Like a Pro: The Ultimate Guide for Tumbler Artists & DIY Crafters

BRIDAL Tumbler Tutorial using Shape Tape Double sided adhesive sheets!
