
FOILED GLITTER Ombré Tumbler Tutorial!
Hey guys, I'm starting with this 32-ounce stainless tumbler. I already prepped with mattify. Now we're going to paint with rustic pink from Rust-Oleum. I love this color. I think I went with two full-coverage coats of this. So we have the whole thing nice and covered. Once that was dry, I went on with my first coat of epoxy. This is our Artistry one-to-one fast-set thick formula spreading on friendly and all over the cup.
Then I cut out these like Leaf shapes on my Silhouette machine in this kind of coppery rose gold vinyl. If you're cutting out a lot of the same shape, weed the surrounding part first. I have done this before, cutting it and then weeding each separately. Save yourself time, then weeding out these line-between parts. This cup was actually for the first cup swap I've ever done, and all I knew was that she liked a simpler classy. She wanted pinks, light pinks, and Rose golds. So I came up with this, and she ended up enjoying it.


I hope I think I did well. Now taking the leaves with me, transfer tape. We're going to put these on our cup. I'm only doing two rows. I'm kind of offsetting and doing a row in the middle and then a row toward the top. We're not doing any on the bottom because that's where our glitter will go, but I continued placing them around the cup until I had them everywhere I wanted. I think I used six total, three on each row, and you could do these. You know more. You could do more random. You could do where they're towards the side and every which way. I wanted them all straight, pointing up the same.
I don't know. It looked excellent and uniform to me then. So I did another layer of epoxy, then I have me mixed epoxy here, and I'm splitting it in between three cups that we have three different colors that we're going to do our foiled glitter with we're using Christmas Eve, which is a lighter pink we're using wish which is like that MediDusty and then Desert Rose which is a little bit darker of a pink when doing this method you want to add a decent amount of glitter you want it to almost be like really thick and chunky feeling if you make it too liquidy it's going to end up dripping you're not going to get that same effect make sure you're adding quite a bit of glitter to almost where it's hard to stir and seems a little bit on the dry side that's what you want.


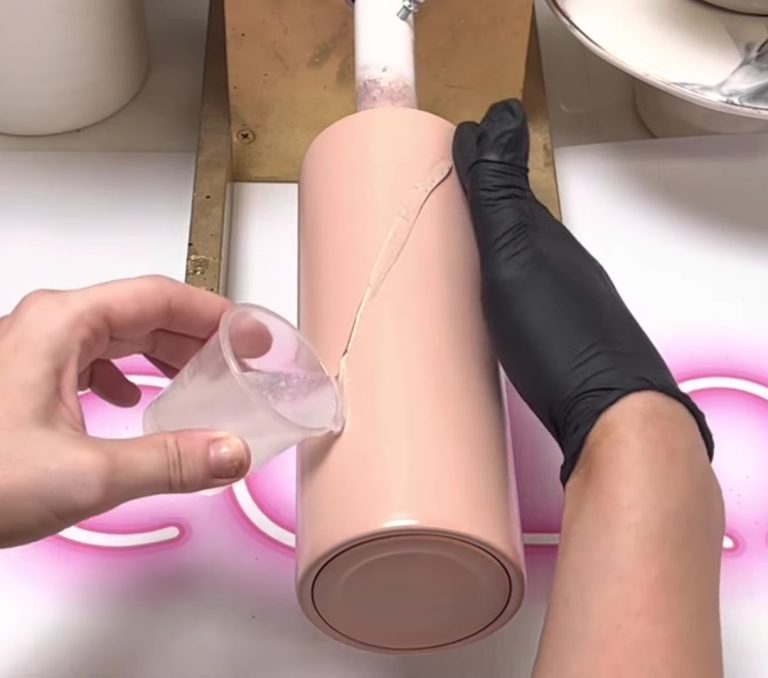
I mixed up all three of my Glitters, then, with this technique, I used a glove on my hand, picked up the epoxy, and spread it on like this. The first time I did this was last all. I think I did this with it was me of my glitter flakes which looked fantastic, and I have done it several times since with regular glitter. This works with chunky glitter flakes. Whatever kind of glitter you want gives it a more metallic foiled look than when you sprinkle it on. I think it looks cool you want to spread it all around. Then I use my hand to spread it upwards. You get that faded, almost like we're doing an ombre. Still, when you're shaking the glitter on, it's a little different than a glitter ombre. You can make this more even all the way across. I like to make it where there are higher and lower points. It depends on what you want but spread enough on and then keep spreading and smoothing it until you're happy with how it looks. This is simple to do, and I think it looks fantastic. This was the first time I did three colors together and did an ombre effect with it.
I only did the two leaves layers, but I covered up the bottom of the first layer. I wanted it to look like the print was already on the cup, and then the glitter was added. So you can see the leaves peeking out, then we're doing the same thing with the next color. This is wish spreading it in the middle. There and if I would let each color dry in between.
I think I would get a smoother overall look if I had done that, but it still worked fine doing that on there and then spreading it up towards the other color. Then I switched gloves between each one, did desert rose on the bottom, and then spread it up towards squish on the sides. I love the different ways, like different textures. I don't know how else to explain it. I love getting a different look and texture and like playing with things and doing things differently. Keep molding that on there till you get it nice and smooth.


I think I got a pretty good ombre fade going on. Then, I put it on my Turner and let it turn because that was quite a bit of epoxy. I didn't want any to drip or hang once that was dry, so I did two more coats of epoxy to finish off the cup, then once I did it, I took it off and put the lid back on, and here it is I love the look of the glitter when doing this it looks completely different than had you shaking it. I love the simple, classy look with the leaves. Let me know what you guys think in the comments, and thank you for watching. I will see you at the next one. Bye guys
HOLLY JOLLY WINE GLASS TUMBLER TUTORIAL!
CHRISTMAS MINT MUG Tumbler Tutorial!
Related Posts

DiY Epoxy vs. Artistry Epoxy: What Happened to “Speedy Petey” and What’s the Best Epoxy for Tumblers & Art?

How Long Does It Take for Epoxy to Yellow (And How to Prevent or Fix It Like a Pro)

Top Reasons Why Your Epoxy Is Sticky and How to Avoid Them

Top 10 Epoxy Tumbler Ideas with Glitter, Pigments & More

How to Mix Epoxy Resin Like a Pro: The Ultimate Guide for Tumbler Artists & DIY Crafters

BRIDAL Tumbler Tutorial using Shape Tape Double sided adhesive sheets!
