
OMBRÉ POWERWASH Lake Life Tumbler Tutorial!
https://youtu.be/nUdN_42vCw4
Hey, guys, let's get started on this lake cup. I'm starting with a stemless wine glass I brought from home goods. This one was 9.99. It doesn't matter. You can get these in plain stainless steel: something to know about if you want to remove the lid and the packaging. If you're doing cups like this, if you're repurposing cups, anything that has a design, prep with mattifying and paint with the white color fix the paint. I thought I'd tell you that while I'm talking about the painting. If you have any kind of design, especially with lighter and darker colors, like these little watermelon seeds are dark, you will want to go in and prime your cup like a whole dark color underneath.
You have one complete layer of a dark color, and there's no way for those darker colors to peek through because I did two layers of color-fix paint and glitter once I sealed it. I ended up spray painting it over the glitter. So first, I spray-painted it white, and then I could still see the seeds, keep that in mind when repurposing the cup. Here's my second layer of color fix paint, and then, while it's still wet, I'm going in with snowy in small, which is pure white glitter with a bit of sparkle to it, and doing a full coverage on the whole cup. Again, I ended up spray painting it over the glitter.


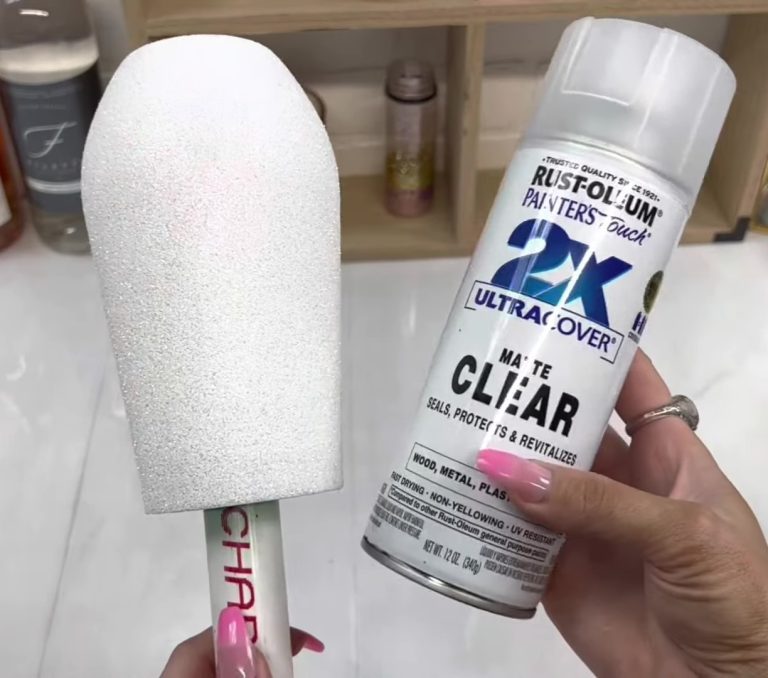
 I spray-painted white like two different coats looked fine, and I could still see the seeds. So just keep that in mind when repurposing a cup. Here's my second layer of color-fix paint. While it's still wet, I'm going in with snowy in small, which is a pure white glitter with a little bit of sparkle to it and doing a full coverage on the whole cup, and that's the fantastic thing about color fix paint is that you go ahead and glitter, so it's two steps in one. It saves so much time and looks at that coverage. Now I'm going in with my rust-ileum clear matte spray. Once that is cured, I will go in with another layer.
We want this to be nice and smooth so we can move on to our next step. I'm using rust-ileum seaside and metallic silver so you can see my little watermelon seeds. I'm doing more coverage in the middle of the cup than at the top and bottom because I wanted to ensure we covered those watermelon seeds. I'm starting with silver. I'm spraying the whole cup with silver, and then we're going to go on the bottom with the blue and do our ombre effect, but I thought it would look cool to have the silver underneath the blue in case you could see some of it.
I spray-painted white like two different coats looked fine, and I could still see the seeds. So just keep that in mind when repurposing a cup. Here's my second layer of color-fix paint. While it's still wet, I'm going in with snowy in small, which is a pure white glitter with a little bit of sparkle to it and doing a full coverage on the whole cup, and that's the fantastic thing about color fix paint is that you go ahead and glitter, so it's two steps in one. It saves so much time and looks at that coverage. Now I'm going in with my rust-ileum clear matte spray. Once that is cured, I will go in with another layer.
We want this to be nice and smooth so we can move on to our next step. I'm using rust-ileum seaside and metallic silver so you can see my little watermelon seeds. I'm doing more coverage in the middle of the cup than at the top and bottom because I wanted to ensure we covered those watermelon seeds. I'm starting with silver. I'm spraying the whole cup with silver, and then we're going to go on the bottom with the blue and do our ombre effect, but I thought it would look cool to have the silver underneath the blue in case you could see some of it.

 Then I went in with the blue on the bottom, went back in with silver to ensure I had full coverage and went back in with the blue again as kind of the same thing you do with glitter ombre. I went back and forth and rinsed that off with cold water, and you can see it's kind of got that ombre effect in the power wash. I let that dry, and then I'm doing another layer of the fast set, so I cut this little SVG out. I will link it down below. It says life is better at the lake, and I use this sparkly glittery vinyl. It's so pretty. I am missing the lake right now. We had a lot of lakes when we were up in Idaho, and now in Texas, it is so hot, and there are no lakes that you can go swimming in, and the pools are warm.
I miss the lake. Suppose you have a lake nearby because it's hot out. I wanted to make a little light cup. I thought it was so fun for summer, and it reminds me of the lovely calm lake, but look at that sparkle. I love this vinyl. I got it at Michael's. I believe so. Then I wanted to do an offset in this blue. I don't even know what you call that color. I took my packing tape because that's what I use to transfer vinyl.
Since I can't find transfer tape that I like, I'm layering those two pieces together and placing them on the top exactly where I want them, ensuring they're straight. Another thing I like to do is set the cup up and make sure that it's straightforward. It's a lot easier to see. So then another layer of the FAFSA epoxy, and while that was wet, I wanted to add a little bit of sparkle. So I'm taking these three chunky glitters. These are not the ones I have on the site to sell, but they're just ones I have in my room for me to play with. I wanted to add a little more sparkle, like when the sun bounces off the top of the water. I thought it'd be a nice little extra touch, so I like it when the sun reflects off the top of the water.
Then I went in with the blue on the bottom, went back in with silver to ensure I had full coverage and went back in with the blue again as kind of the same thing you do with glitter ombre. I went back and forth and rinsed that off with cold water, and you can see it's kind of got that ombre effect in the power wash. I let that dry, and then I'm doing another layer of the fast set, so I cut this little SVG out. I will link it down below. It says life is better at the lake, and I use this sparkly glittery vinyl. It's so pretty. I am missing the lake right now. We had a lot of lakes when we were up in Idaho, and now in Texas, it is so hot, and there are no lakes that you can go swimming in, and the pools are warm.
I miss the lake. Suppose you have a lake nearby because it's hot out. I wanted to make a little light cup. I thought it was so fun for summer, and it reminds me of the lovely calm lake, but look at that sparkle. I love this vinyl. I got it at Michael's. I believe so. Then I wanted to do an offset in this blue. I don't even know what you call that color. I took my packing tape because that's what I use to transfer vinyl.
Since I can't find transfer tape that I like, I'm layering those two pieces together and placing them on the top exactly where I want them, ensuring they're straight. Another thing I like to do is set the cup up and make sure that it's straightforward. It's a lot easier to see. So then another layer of the FAFSA epoxy, and while that was wet, I wanted to add a little bit of sparkle. So I'm taking these three chunky glitters. These are not the ones I have on the site to sell, but they're just ones I have in my room for me to play with. I wanted to add a little more sparkle, like when the sun bounces off the top of the water. I thought it'd be a nice little extra touch, so I like it when the sun reflects off the top of the water.


 I thought it'd be a nice little extra touch. So I randomly write a little bit here and there. We don't go overboard with this, just a little sparkle here and there. So I did one final layer to cover that glitter to finish this cup. I don't know why I didn't use a tripod with my hands all over the place. Sorry, I put the lid and straw back on, and I went outside to this little wooden palette that looked like a deck to give me those lake vibes that I'm missing, but how cute is this? I'm going to jump in the lake right now.
So if you can jump in the lake for me, I love how this turned out. So I'll see you guys in the next one. Bye.
I thought it'd be a nice little extra touch. So I randomly write a little bit here and there. We don't go overboard with this, just a little sparkle here and there. So I did one final layer to cover that glitter to finish this cup. I don't know why I didn't use a tripod with my hands all over the place. Sorry, I put the lid and straw back on, and I went outside to this little wooden palette that looked like a deck to give me those lake vibes that I'm missing, but how cute is this? I'm going to jump in the lake right now.
So if you can jump in the lake for me, I love how this turned out. So I'll see you guys in the next one. Bye.
I spray-painted white like two different coats looked fine, and I could still see the seeds. So just keep that in mind when repurposing a cup. Here's my second layer of color-fix paint. While it's still wet, I'm going in with snowy in small, which is a pure white glitter with a little bit of sparkle to it and doing a full coverage on the whole cup, and that's the fantastic thing about color fix paint is that you go ahead and glitter, so it's two steps in one. It saves so much time and looks at that coverage. Now I'm going in with my rust-ileum clear matte spray. Once that is cured, I will go in with another layer.
We want this to be nice and smooth so we can move on to our next step. I'm using rust-ileum seaside and metallic silver so you can see my little watermelon seeds. I'm doing more coverage in the middle of the cup than at the top and bottom because I wanted to ensure we covered those watermelon seeds. I'm starting with silver. I'm spraying the whole cup with silver, and then we're going to go on the bottom with the blue and do our ombre effect, but I thought it would look cool to have the silver underneath the blue in case you could see some of it.
Then I went in with the blue on the bottom, went back in with silver to ensure I had full coverage and went back in with the blue again as kind of the same thing you do with glitter ombre. I went back and forth and rinsed that off with cold water, and you can see it's kind of got that ombre effect in the power wash. I let that dry, and then I'm doing another layer of the fast set, so I cut this little SVG out. I will link it down below. It says life is better at the lake, and I use this sparkly glittery vinyl. It's so pretty. I am missing the lake right now. We had a lot of lakes when we were up in Idaho, and now in Texas, it is so hot, and there are no lakes that you can go swimming in, and the pools are warm.
I miss the lake. Suppose you have a lake nearby because it's hot out. I wanted to make a little light cup. I thought it was so fun for summer, and it reminds me of the lovely calm lake, but look at that sparkle. I love this vinyl. I got it at Michael's. I believe so. Then I wanted to do an offset in this blue. I don't even know what you call that color. I took my packing tape because that's what I use to transfer vinyl.
Since I can't find transfer tape that I like, I'm layering those two pieces together and placing them on the top exactly where I want them, ensuring they're straight. Another thing I like to do is set the cup up and make sure that it's straightforward. It's a lot easier to see. So then another layer of the FAFSA epoxy, and while that was wet, I wanted to add a little bit of sparkle. So I'm taking these three chunky glitters. These are not the ones I have on the site to sell, but they're just ones I have in my room for me to play with. I wanted to add a little more sparkle, like when the sun bounces off the top of the water. I thought it'd be a nice little extra touch, so I like it when the sun reflects off the top of the water.
I thought it'd be a nice little extra touch. So I randomly write a little bit here and there. We don't go overboard with this, just a little sparkle here and there. So I did one final layer to cover that glitter to finish this cup. I don't know why I didn't use a tripod with my hands all over the place. Sorry, I put the lid and straw back on, and I went outside to this little wooden palette that looked like a deck to give me those lake vibes that I'm missing, but how cute is this? I'm going to jump in the lake right now.
So if you can jump in the lake for me, I love how this turned out. So I'll see you guys in the next one. Bye.
Previous post
DOUBLE SIDED ADHESIVE SHEETS and FOIL Tumbler Tutorial using SHAPE TAPE!
Next post
TROPICAL PARADISE GLITTER TUMBLER MUG TUTORIAL!
Related Posts

DiY Epoxy vs. Artistry Epoxy: What Happened to “Speedy Petey” and What’s the Best Epoxy for Tumblers & Art?
Why You Can’t Find “Speedy Petey” & What Replaced It If you’ve been Googling “Speedy Petey epoxy” and coming up empty, here’s the short...
Nov 06 2025

How Long Does It Take for Epoxy to Yellow (And How to Prevent or Fix It Like a Pro)
How Long Before Epoxy Resin Turns Yellow? One of the most common questions in the epoxy art and crafts world is: “How long before...
Jul 08 2025

Top Reasons Why Your Epoxy Is Sticky and How to Avoid Them
Whether you're designing a sparkling glitter tumbler, pouring a stunning river table, or experimenting with colorful resin art, few things are more disappointing than...
Jun 30 2025

Top 10 Epoxy Tumbler Ideas with Glitter, Pigments & More
Crafting epoxy tumblers is one of the most exciting and rewarding trends in the DIY world. Whether you're making a custom tumbler for personal...
Jun 25 2025

How to Mix Epoxy Resin Like a Pro: The Ultimate Guide for Tumbler Artists & DIY Crafters
Epoxy resin is a total game-changer for DIY crafters—especially tumbler makers who love that smooth, glass-like finish. But even the most creative designs can...
Jun 22 2025

BRIDAL Tumbler Tutorial using Shape Tape Double sided adhesive sheets!
Today, we're diving into a fun DIY project: creating a beautiful bride cup using a few of our favorite products, including shape tape, epoxy,...
May 17 2024

Is Artistry Epoxy good?
In the realm of DIY projects, home renovations, and artistic endeavors, epoxy resin has emerged as a versatile and captivating medium. Among the myriad...
Mar 27 2024