
SPRAY PAINTED PLAID PEEK-A-BOO Tumbler Tutorial! Day 10 of 10 Days of Fall!
https://youtu.be/_0PeUe80yrw
Hey guys, welcome to the 10th and final day of my ten fall days. This has been so much fun, and of course, I saved the best for last you guys this cup. I am so excited about this. I had this vision in my head, and it came out better than I expected. This is my plaid peekaboo mug, and I couldn't be happier with it. I am in love like this. This is my absolute favorite of all the fall cups this year. I have a giveaway on the Glitters I used and the epoxy, so check that out below for details. Again, I am so proud of this cup.
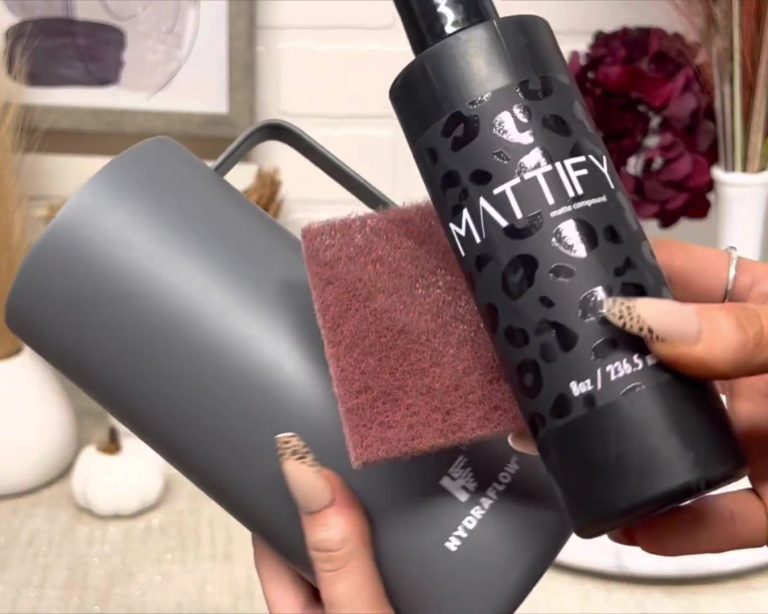
I'm so excited about my 12 Days of Christmas because you know that that is coming too soon. I have big plans for that. I can't wait for all the giveaways I'm doing. Thank you guys so much for watching my series. If you haven't already, check out all the other days, and let's get into the tutorial. We're starting with this hydro flow Parker mug; I've used this brand a lot. I like them. This was $14.99 at TJ Maxx, I just took off the lid, and the packaging, then prepped with mattify in an abrasive pad, then spray painted metallic gold just as a base for our glitter.
I ended up losing the footage from glittering the cup. Still, this video is already really long, and it's just using the epoxy method to glitter the cup. The top glitter, the brown one is Cove, the middle one is dusk, and the bottom one is a golden hour. I just thought it would be beautiful to have the different tones in there, so I did that and epoxied it to make it nice and smooth then I'm going in with ivory silk, Stone gray, and Nutmeg. Just those are my three colors for our plaid. The first thing I did was tape off the handle; I wanted the handle to stay gold, so I just Taped that off so that we could do our plaid.

 We're making the base. The ivory Silk does not have an entirely smooth cup, but that's okay. We'll use the distressing in those areas, so don't worry about it. So once that was dry, we're going to start with our plaid. I am using two different sizes of the painter's tape to give us it's not just like an even squared plaid. It kind of gives us those different shapes. This is also easier to do than on a handled mug, but I just thought it would be cute on a mug, so I made it a lot harder on myself and had to work around the handles. This technique I learned from Danielle at damn fancy Creations. I will link her Channel and her plaid video below; I had never seen a spray-painted plaid before I watched her.
We're going to use the more petite tape as just a guide for spacing the more significant tape so you lay the next one down. Then you peel up the smaller one and just continue to do that around the whole cup, and it's not entirely even, but I feel like the result you don't notice it, so I'm going to take that stone gray, and we're just doing a very very light coat of the spray paint just like a dusting. Now this plaid process can seem confusing, but it's pretty simple. You just have to make sure you get the steps right, so peel that off, and you can see it's grayer, but it's not like a full coverage Gray.
We're going to do the vertical stripes, so I'm using the larger one as the spacer, and I'm just starting at the bottom. So then I'm taking that gray and just going on with a little bit more than we did the last time, also spraying the bottom a little bit. Then I'm also taking the nutmeg and doing a little light dusting of the nutmeg.
We're making the base. The ivory Silk does not have an entirely smooth cup, but that's okay. We'll use the distressing in those areas, so don't worry about it. So once that was dry, we're going to start with our plaid. I am using two different sizes of the painter's tape to give us it's not just like an even squared plaid. It kind of gives us those different shapes. This is also easier to do than on a handled mug, but I just thought it would be cute on a mug, so I made it a lot harder on myself and had to work around the handles. This technique I learned from Danielle at damn fancy Creations. I will link her Channel and her plaid video below; I had never seen a spray-painted plaid before I watched her.
We're going to use the more petite tape as just a guide for spacing the more significant tape so you lay the next one down. Then you peel up the smaller one and just continue to do that around the whole cup, and it's not entirely even, but I feel like the result you don't notice it, so I'm going to take that stone gray, and we're just doing a very very light coat of the spray paint just like a dusting. Now this plaid process can seem confusing, but it's pretty simple. You just have to make sure you get the steps right, so peel that off, and you can see it's grayer, but it's not like a full coverage Gray.
We're going to do the vertical stripes, so I'm using the larger one as the spacer, and I'm just starting at the bottom. So then I'm taking that gray and just going on with a little bit more than we did the last time, also spraying the bottom a little bit. Then I'm also taking the nutmeg and doing a little light dusting of the nutmeg.


 Our next step is to leave that tape on there, and you're going to replace the video where it was on the first time we spray-painted so the lighter cream sections with the giant tape. So we're replacing tape on there. I'm taking gray and going on with a heavier layer. And the brown and going with a heavier coating. So yes, this looks like a hot mess of garbage, but just trust the process. Once we peel it off, so just peel off all the tape.
Then you start to see the Plaid look come together now. You could leave it at that. I just wanted to add the minor striping in between, but because this is a peekaboo, I couldn't do like Pinstripes or nail tape. So I marked all the centers of the squares so that I knew where half the halfway mark was, and we're just doing little tiny lines to paint a darker brown.
So you see, it's just a fine line there, so I just go ahead and do the whole cup. Then I have to work around the handles again. Then I'm taking the London gray, which looks more like a dark brown to me but spraying and making sure to coat those little lines heavily so that we get full coverage like the line in there just peeling that. You can tell I did not stick those down as well as I should have. Just make sure if you're doing these little lines that you attach the tape down with those beautiful Stripes as well, and I removed the video from the handle as well since we're all done with spray paint.
Our next step is to leave that tape on there, and you're going to replace the video where it was on the first time we spray-painted so the lighter cream sections with the giant tape. So we're replacing tape on there. I'm taking gray and going on with a heavier layer. And the brown and going with a heavier coating. So yes, this looks like a hot mess of garbage, but just trust the process. Once we peel it off, so just peel off all the tape.
Then you start to see the Plaid look come together now. You could leave it at that. I just wanted to add the minor striping in between, but because this is a peekaboo, I couldn't do like Pinstripes or nail tape. So I marked all the centers of the squares so that I knew where half the halfway mark was, and we're just doing little tiny lines to paint a darker brown.
So you see, it's just a fine line there, so I just go ahead and do the whole cup. Then I have to work around the handles again. Then I'm taking the London gray, which looks more like a dark brown to me but spraying and making sure to coat those little lines heavily so that we get full coverage like the line in there just peeling that. You can tell I did not stick those down as well as I should have. Just make sure if you're doing these little lines that you attach the tape down with those beautiful Stripes as well, and I removed the video from the handle as well since we're all done with spray paint.


 Then it was time for distressing, so I used some acetone and a paper towel and rubbed off the paint where I wanted the glitter to show. I always do the whole top rim and the whole bottom with a Q-tip and just clean it up and make sure that there's no cloudiness from the spray paint fenders. So anywhere the spray paint was not looking great is where I did the distressing after I finished distressing, so I did another layer of the epoxy. For the decal, I got this little decal from Etsy. It just says Farm Fresh pumpkins hand-picked, so cute, and I cut around it so that I could see where we want it on the cup so we can do a spray-painted bleach spot, so I checked where I wanted it.
I'm taking the flat white Rust-Oleum paint and spray painting right in that area. We don't want to make it too big of a site then going on with that nutmeg just like a little just to give it a little hit of it, so it's not pure white then just taking acetone and cleaning up around the edges and where I don't want the paint just making sure that bleach spot isn't too big. It's just where we need tape to put the decal onto the cup. Sorry about this angle; I don't know what I was doing, but t did one more layer of epoxy to finish the cup.
I love the peekaboo. I love the distressing. I love the plaid. It's all the things I wanted. Thank you for watching the ten days of fall series.
Then it was time for distressing, so I used some acetone and a paper towel and rubbed off the paint where I wanted the glitter to show. I always do the whole top rim and the whole bottom with a Q-tip and just clean it up and make sure that there's no cloudiness from the spray paint fenders. So anywhere the spray paint was not looking great is where I did the distressing after I finished distressing, so I did another layer of the epoxy. For the decal, I got this little decal from Etsy. It just says Farm Fresh pumpkins hand-picked, so cute, and I cut around it so that I could see where we want it on the cup so we can do a spray-painted bleach spot, so I checked where I wanted it.
I'm taking the flat white Rust-Oleum paint and spray painting right in that area. We don't want to make it too big of a site then going on with that nutmeg just like a little just to give it a little hit of it, so it's not pure white then just taking acetone and cleaning up around the edges and where I don't want the paint just making sure that bleach spot isn't too big. It's just where we need tape to put the decal onto the cup. Sorry about this angle; I don't know what I was doing, but t did one more layer of epoxy to finish the cup.
I love the peekaboo. I love the distressing. I love the plaid. It's all the things I wanted. Thank you for watching the ten days of fall series.
We're making the base. The ivory Silk does not have an entirely smooth cup, but that's okay. We'll use the distressing in those areas, so don't worry about it. So once that was dry, we're going to start with our plaid. I am using two different sizes of the painter's tape to give us it's not just like an even squared plaid. It kind of gives us those different shapes. This is also easier to do than on a handled mug, but I just thought it would be cute on a mug, so I made it a lot harder on myself and had to work around the handles. This technique I learned from Danielle at damn fancy Creations. I will link her Channel and her plaid video below; I had never seen a spray-painted plaid before I watched her.
We're going to use the more petite tape as just a guide for spacing the more significant tape so you lay the next one down. Then you peel up the smaller one and just continue to do that around the whole cup, and it's not entirely even, but I feel like the result you don't notice it, so I'm going to take that stone gray, and we're just doing a very very light coat of the spray paint just like a dusting. Now this plaid process can seem confusing, but it's pretty simple. You just have to make sure you get the steps right, so peel that off, and you can see it's grayer, but it's not like a full coverage Gray.
We're going to do the vertical stripes, so I'm using the larger one as the spacer, and I'm just starting at the bottom. So then I'm taking that gray and just going on with a little bit more than we did the last time, also spraying the bottom a little bit. Then I'm also taking the nutmeg and doing a little light dusting of the nutmeg.
Our next step is to leave that tape on there, and you're going to replace the video where it was on the first time we spray-painted so the lighter cream sections with the giant tape. So we're replacing tape on there. I'm taking gray and going on with a heavier layer. And the brown and going with a heavier coating. So yes, this looks like a hot mess of garbage, but just trust the process. Once we peel it off, so just peel off all the tape.
Then you start to see the Plaid look come together now. You could leave it at that. I just wanted to add the minor striping in between, but because this is a peekaboo, I couldn't do like Pinstripes or nail tape. So I marked all the centers of the squares so that I knew where half the halfway mark was, and we're just doing little tiny lines to paint a darker brown.
So you see, it's just a fine line there, so I just go ahead and do the whole cup. Then I have to work around the handles again. Then I'm taking the London gray, which looks more like a dark brown to me but spraying and making sure to coat those little lines heavily so that we get full coverage like the line in there just peeling that. You can tell I did not stick those down as well as I should have. Just make sure if you're doing these little lines that you attach the tape down with those beautiful Stripes as well, and I removed the video from the handle as well since we're all done with spray paint.
Then it was time for distressing, so I used some acetone and a paper towel and rubbed off the paint where I wanted the glitter to show. I always do the whole top rim and the whole bottom with a Q-tip and just clean it up and make sure that there's no cloudiness from the spray paint fenders. So anywhere the spray paint was not looking great is where I did the distressing after I finished distressing, so I did another layer of the epoxy. For the decal, I got this little decal from Etsy. It just says Farm Fresh pumpkins hand-picked, so cute, and I cut around it so that I could see where we want it on the cup so we can do a spray-painted bleach spot, so I checked where I wanted it.
I'm taking the flat white Rust-Oleum paint and spray painting right in that area. We don't want to make it too big of a site then going on with that nutmeg just like a little just to give it a little hit of it, so it's not pure white then just taking acetone and cleaning up around the edges and where I don't want the paint just making sure that bleach spot isn't too big. It's just where we need tape to put the decal onto the cup. Sorry about this angle; I don't know what I was doing, but t did one more layer of epoxy to finish the cup.
I love the peekaboo. I love the distressing. I love the plaid. It's all the things I wanted. Thank you for watching the ten days of fall series.
Previous post
FALL FAWN GLITTER SWIRL Tumbler Tutorial! Day 9 of 10 Days of Fall!
Next post
RUBY RED GLITTER TUMBLER TUTORIAL!
Related Posts

DiY Epoxy vs. Artistry Epoxy: What Happened to “Speedy Petey” and What’s the Best Epoxy for Tumblers & Art?
Why You Can’t Find “Speedy Petey” & What Replaced It If you’ve been Googling “Speedy Petey epoxy” and coming up empty, here’s the short...
Nov 06 2025

How Long Does It Take for Epoxy to Yellow (And How to Prevent or Fix It Like a Pro)
How Long Before Epoxy Resin Turns Yellow? One of the most common questions in the epoxy art and crafts world is: “How long before...
Jul 08 2025

Top Reasons Why Your Epoxy Is Sticky and How to Avoid Them
Whether you're designing a sparkling glitter tumbler, pouring a stunning river table, or experimenting with colorful resin art, few things are more disappointing than...
Jun 30 2025

Top 10 Epoxy Tumbler Ideas with Glitter, Pigments & More
Crafting epoxy tumblers is one of the most exciting and rewarding trends in the DIY world. Whether you're making a custom tumbler for personal...
Jun 25 2025

How to Mix Epoxy Resin Like a Pro: The Ultimate Guide for Tumbler Artists & DIY Crafters
Epoxy resin is a total game-changer for DIY crafters—especially tumbler makers who love that smooth, glass-like finish. But even the most creative designs can...
Jun 22 2025

BRIDAL Tumbler Tutorial using Shape Tape Double sided adhesive sheets!
Today, we're diving into a fun DIY project: creating a beautiful bride cup using a few of our favorite products, including shape tape, epoxy,...
May 17 2024

Is Artistry Epoxy good?
In the realm of DIY projects, home renovations, and artistic endeavors, epoxy resin has emerged as a versatile and captivating medium. Among the myriad...
Mar 27 2024