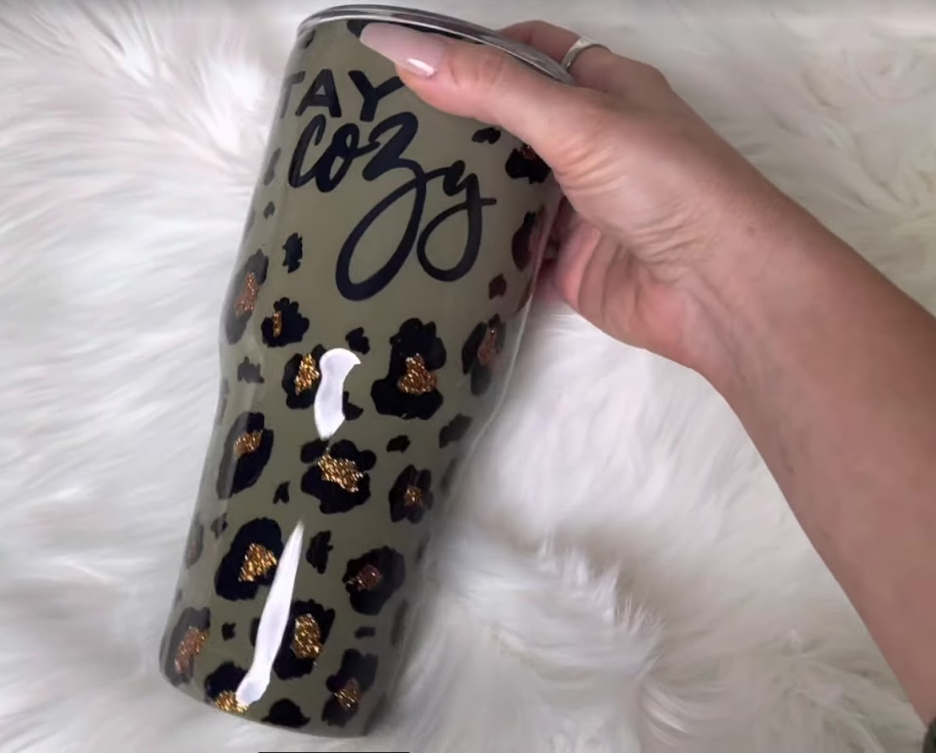
Stay Cozy Leopard Print Tumbler!
On this cup, I used glitter from my new dessert collection. I will leave a link below if you have not checked that out. This is the shade dune. I'm doing a glitter giveaway in this video. I'm going to give five of you a glitter of your choice from my desert collection, so to enter this giveaway, you just need to subscribe to my youtube channel, ring the notification bell, comment on this video, and also join my Facebook group it's just glazed epoxy. I will have all that down below for you and links as well. I'm going to give away five full-size glitters from my desert collection. Let's get into the tutorial if you want to see how I did this tumbler here.
I took this stainless cup from Ross, which was only $10.99. I took all the stickers off and prepped them, then used the oregano by rust-oleum color. I cannot get over this color like this cup, just plain green I would be obsessed with this color stunning I love it, so just painting it this green.


Then once that was dry, I mixed up my artistry art and tumbler epoxy and just did a whole coat of that, making sure to get it all coated everywhere nicely. Once that was cured, taking my black vinyl and did a charming little stay cozy. I figured that would be cute, like fall, kind of saying, without being too fall so that this cup can be used all year round, but it just gives a little nod to the fall cozy up by the fireplace in a blanket of vibe.
I just placed that on my cup at the top. I like to lift the cup, set it on a table, and look at it from there. I feel like it helps make sure that it's level. I don't know what it is about it lying down. Sometimes it looks level, but it's not, so I pick it up, set it on the table, give it a good look, and then decide if it's where it needs to be. So I'm taking my trusty mod podge.
We're going to do some glitter leopard spots, and we're just doing the inside part of the spot right now using my glitter dune from my desert collection that is out now. I will leave links down below. I'm doing these leopard spots. I'm trying to spread them out more and make them more significant than I usually do. I am just doing some mod podge, making sure to do enough. I feel like if you do, you don't get enough on. There's not a lot of the glitter sticks, so you feel like you're going to be putting too much on, but that's perfect, then sprinkling the glitter. And with the mod podge, you're only going to do, you know, five to seven spots at a time, glitter them, and then move on, or else your mod podge will start drying, and then your glitter will not stick, so keep that in mind. So just work in smaller sections, so now we're just covering the entire cup with these spots, including the bottom.


I don't want to fight with you. So once that is completely dry, you do not want to do this until the mod podge is thoroughly dried. You'll take a stiffer brush and wipe off the excess glitter. Sometimes it sticks more than others to the rest of the epoxy. It depends on how long the epoxy's been cured, but if it's sticking, just keep working at it, or you can even use masking tape to get off the excess glitter. But as I said, make sure the mod podge is dry. I like to wait at least 10 hours to ensure that it is dry, then you're going to take clear spray paint and seal it. That's why it kind of looks matte. Then do another layer of epoxy. Still, you're going to want to pack your glitter so that when you're putting on the next layer of epoxy, you're not rubbing around and moving the glitter because then you're going to get little glitters all over the beautiful green, and we don't want that.
So now that that is dry, I'm taking my craft smart black paint pen to draw on leopard prints, and you're just going to do big random Leopard prints. It's just this is all personal preference, and this style that I did here is like the favorite that I've ever done, so it takes a little time, but you're just going to hand draw all these little leopard prints all around the cup. So I feel like I just would instead give tighten them.
You'll also want to be careful not to touch where you've done the paint pen. It does take you to know, like ten or so minutes to fully dry so that it won't transfer on your finger, and I've had before where I touch it. Then I connect the cup, and I'm getting little smudges everywhere that are not good, so just be mindful of where your hands are feeling the cup. This paint pen works the best for this. I used to use just a black sharpie. It does work but compared to this. It's just not as black. It's not as clean looking, so if you want a lovely black leopard print go ahead and get a paint pen like this one is just from Michael's, and they have so many different colors too, so paint pen over sharpie any day


We'll continue around the entire cup until we're thoroughly done. So now I'm just going back through and adding just little spots in between of just black this helps to finalize and make this look that much better, so if you're not doing this with your leopard print, try it out. Just fill in all those little gaps with just that one color. It just looks so much better, in my opinion.
So once that was dry, I gave it a good couple of hours to fully dry. Then, finally, I did two more coats of my artistry epoxy to finish this cup.
She's done. I think she turned out amazing, just the cozy vibes. That is it for this tutorial guys. It turns out so cute. Make sure you stay tuned for future cups. Bye!
Initial V-Split Water Bottle Tumbler Tutorial!
FALL VIBES Tumbler Burst Tutorial! Day 1 of 10 Days of Fall!
Related Posts

DiY Epoxy vs. Artistry Epoxy: What Happened to “Speedy Petey” and What’s the Best Epoxy for Tumblers & Art?

How Long Does It Take for Epoxy to Yellow (And How to Prevent or Fix It Like a Pro)

Top Reasons Why Your Epoxy Is Sticky and How to Avoid Them

Top 10 Epoxy Tumbler Ideas with Glitter, Pigments & More

How to Mix Epoxy Resin Like a Pro: The Ultimate Guide for Tumbler Artists & DIY Crafters

BRIDAL Tumbler Tutorial using Shape Tape Double sided adhesive sheets!
